How to Take Good Pictures of Yourself: Simple Tips

Learning how to take good pictures of yourself shouldn’t require a professional photographer, expensive equipment, or a degree in confidence. And yet most of us have deleted more photos than we’ve kept-convinced we’re just not photogenic.
Here’s what 18+ years behind the camera has taught me: the problem isn’t you. It’s distance, angle, and a few technical mistakes that are surprisingly easy to fix. (Your face is fine. Your arm length is the issue.) Once you understand these basics, getting better photos becomes surprisingly simple-a real game changer for anyone who needs to show up online.
This guide gives you a photographer’s system for taking photos of yourself that actually look like someone else took them. No selfie sticks required. No awkward arm stretch. Just better pictures, on your phone, whenever you need them. It’s an easy way to get your best photos without booking a professional.
To take good pictures of yourself:
- Step the camera back to avoid lens distortion (use a tripod or timer)
- Position it slightly above eye level, not below
- Use soft natural light, not direct sunlight-good lighting makes all the difference
- Add small movements or actions instead of holding a stiff pose
One simple trick: treat every self-photo like a mini photo shoot rather than a quick snap.
Why Most Photos of Yourself Don’t Turn Out Well (It’s Not You)
When clients arrive at my studio, the first thing many say is some version of “I’m really not photogenic.” Successful businesswomen. Confident speakers. People who command rooms. The moment a camera appears, they’re convinced something is fundamentally wrong with how they photograph.
It isn’t.
What’s actually happening is a combination of three fixable problems:
The camera is too close. When you hold your phone at arm’s length, the lens distorts your features. Noses look bigger. Faces look wider. That dreaded double chin appears out of nowhere-even on people who don’t have one. This isn’t how other people see you-it’s how a lens two feet from your face sees you. Spoiler: not flattering for anyone.
The angle is working against you. Most selfies are taken from slightly below eye level (because that’s where your arm naturally falls when you’re pretending you’re not taking a selfie). This is the least flattering angle for almost everyone. It shortens the neck, emphasises the jawline in unflattering ways, and makes you look like you’re peering down at the camera with mild suspicion.
Your body doesn’t know what to do. Nobody looks natural when they’re trying to look natural. The moment a camera appears, your arms suddenly feel like they belong to someone else-just hanging there like confused robots. The stiffness shows up everywhere-raised shoulders, gripped hands, a frozen smile that reads as tense rather than warm.
I’ve photographed enough people to see the pattern clearly: when you fix these three things, people like their photos immediately. Even the ones who arrived certain they’d hate every shot. Many tell me it’s the first time they’ve actually liked a picture of themselves in a long time-and that includes people who cringe at every old picture they see.
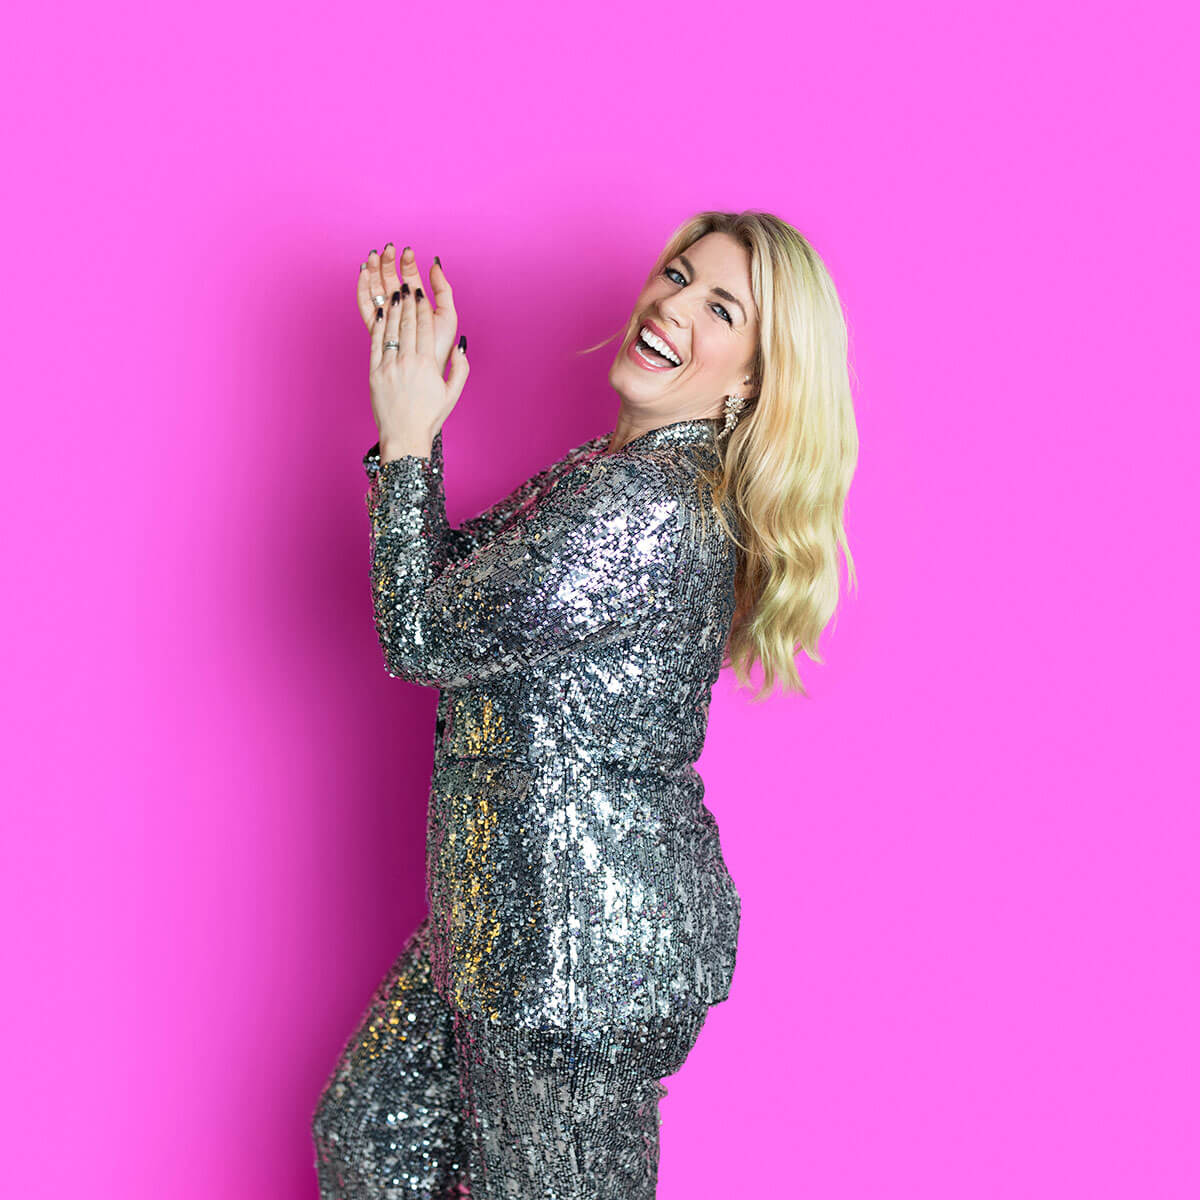
Here’s what that difference actually looks like in real life.
What Makes a Good Picture of Yourself (According to a Professional Photographer)
Before diving into techniques, it helps to know what we’re aiming for.
A good picture of yourself has:
- Flattering proportions – your features look balanced, not distorted by a too-close lens
- Relaxed body language – your shoulders, hands, and facial expression all signal ease
- A clear focal point – you’re the main subject, not competing with a cluttered background
- Enough light – soft, directional lighting that shapes your face without harsh shadows
The great photos you admire on other people’s profiles? They tick these boxes. And you can achieve the same final result with your phone camera once you understand what creates it. It’s about being in the right place with the right time to set up properly, and knowing how to highlight your best features.
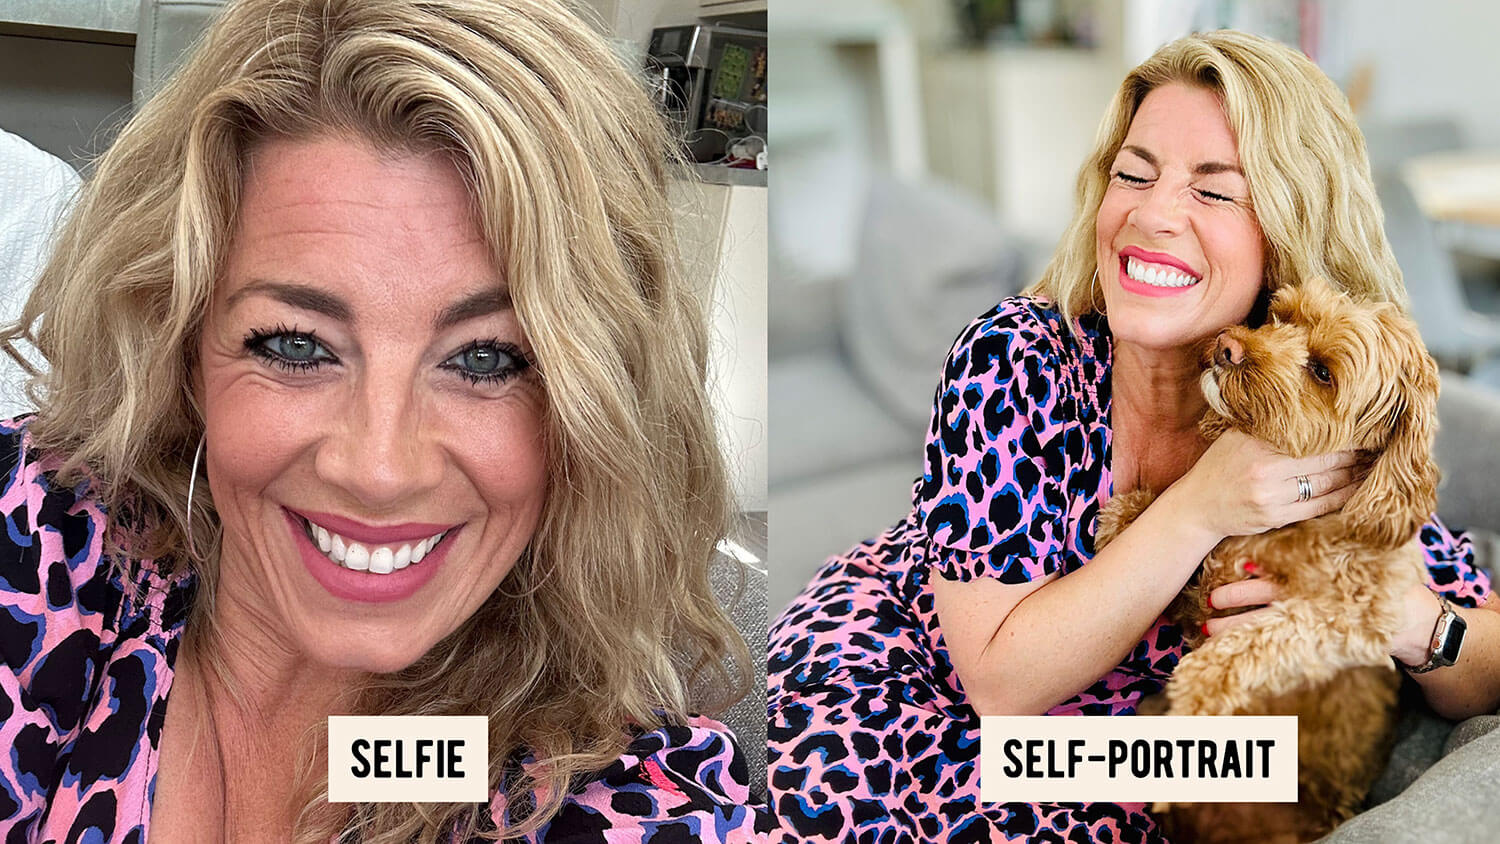
Selfie vs Self-Portrait: The Shift That Changes Everything
Most people want self-portrait results but use selfie techniques. That’s the core problem.
A selfie is reactive: phone at arm’s length, front-facing camera, quick snap, hope for the best, delete seventeen takes, try again. The camera is too close, the framing is accidental, and you’re simultaneously the photographer and the subject with no way to see what’s actually happening. Standing in front of the camera like this rarely produces a great selfie.
A self-portrait is intentional: camera stepped back, framed deliberately, taken with a timer or remote so you’re not stretching toward the lens. It’s planned. It looks like someone else took it-because technically, time-delayed you did. Finding the perfect angle becomes much easier when you’re not holding the phone.
The moment you stop treating photos of yourself like selfies and start treating them like self-portraits, the quality changes completely. Your selfie game improves dramatically when you make this mental shift.
Can You Still Use These Tips for Selfies? Yes, Here’s How
If you’re wondering how to take a good selfie without a tripod, these principles still apply. Sometimes you genuinely need a quick photo and setting up isn’t practical:
- Raise the phone slightly above eye level – even a few inches makes a difference
- Extend your arm fully – maximum distance from your face
- Turn your body at a slight angle – don’t face the camera square-on
- Use the front-facing camera – so you can see what you’re getting
- Make small adjustments between shots – tilt your chin, shift your gaze, try different angles
You won’t get professional photo results, but you’ll get a much better selfie than the arms length default.
The Rosie Distance Method (A Photographer’s Checklist)
After years of teaching DIY brand photography, I developed a simple system that works whether you’re taking photos for social media, your profile picture, or professional headshots.
It’s an acronym because acronyms stick. And this one spells DISTANCE-which is exactly where most people go wrong.
D – Distance First
This is the most important factor and the best way to instantly improve your photos. Also the thing nobody does because it feels weird.
Set your phone camera further away than feels natural. Use a tripod, a shelf, a stack of books, a helpful stranger-whatever gets that lens at least 6-8 feet from your face. Crop later.
Why? A close lens creates distortion. The camera lens exaggerates whatever is nearest to it-usually your nose. Step back and you get natural proportions. That double chin everyone worries about? Often it’s not a chin problem. It’s a distance problem.
My actual setup: I use a mini tripod that folds flat into my handbag, a Bluetooth remote clicker, and my iPhone (though I’ve achieved similar results on Android). Timer set to 3 seconds. That’s it. Genuinely nothing fancy-just distance. You don’t need the best camera or any special equipment-a normal camera on your phone works brilliantly. Some remotes have wifi capabilities, but a simple Bluetooth remote release shutter does the job perfectly for any photo shoot.
I – Intentional Angle
Position the camera just above eye level. Never below.
Turn your body slightly rather than facing square-on-about 45 degrees works well for most people. This creates depth and dimension rather than a flat, passport-photo effect. If you know the rule of thirds, try positioning yourself slightly off-centre for a more dynamic composition.
For your chin, imagine there’s a string gently pulling it forward and slightly down. This lengthens the neck and defines the jawline.
Find out the posing tips that instantly look more natural
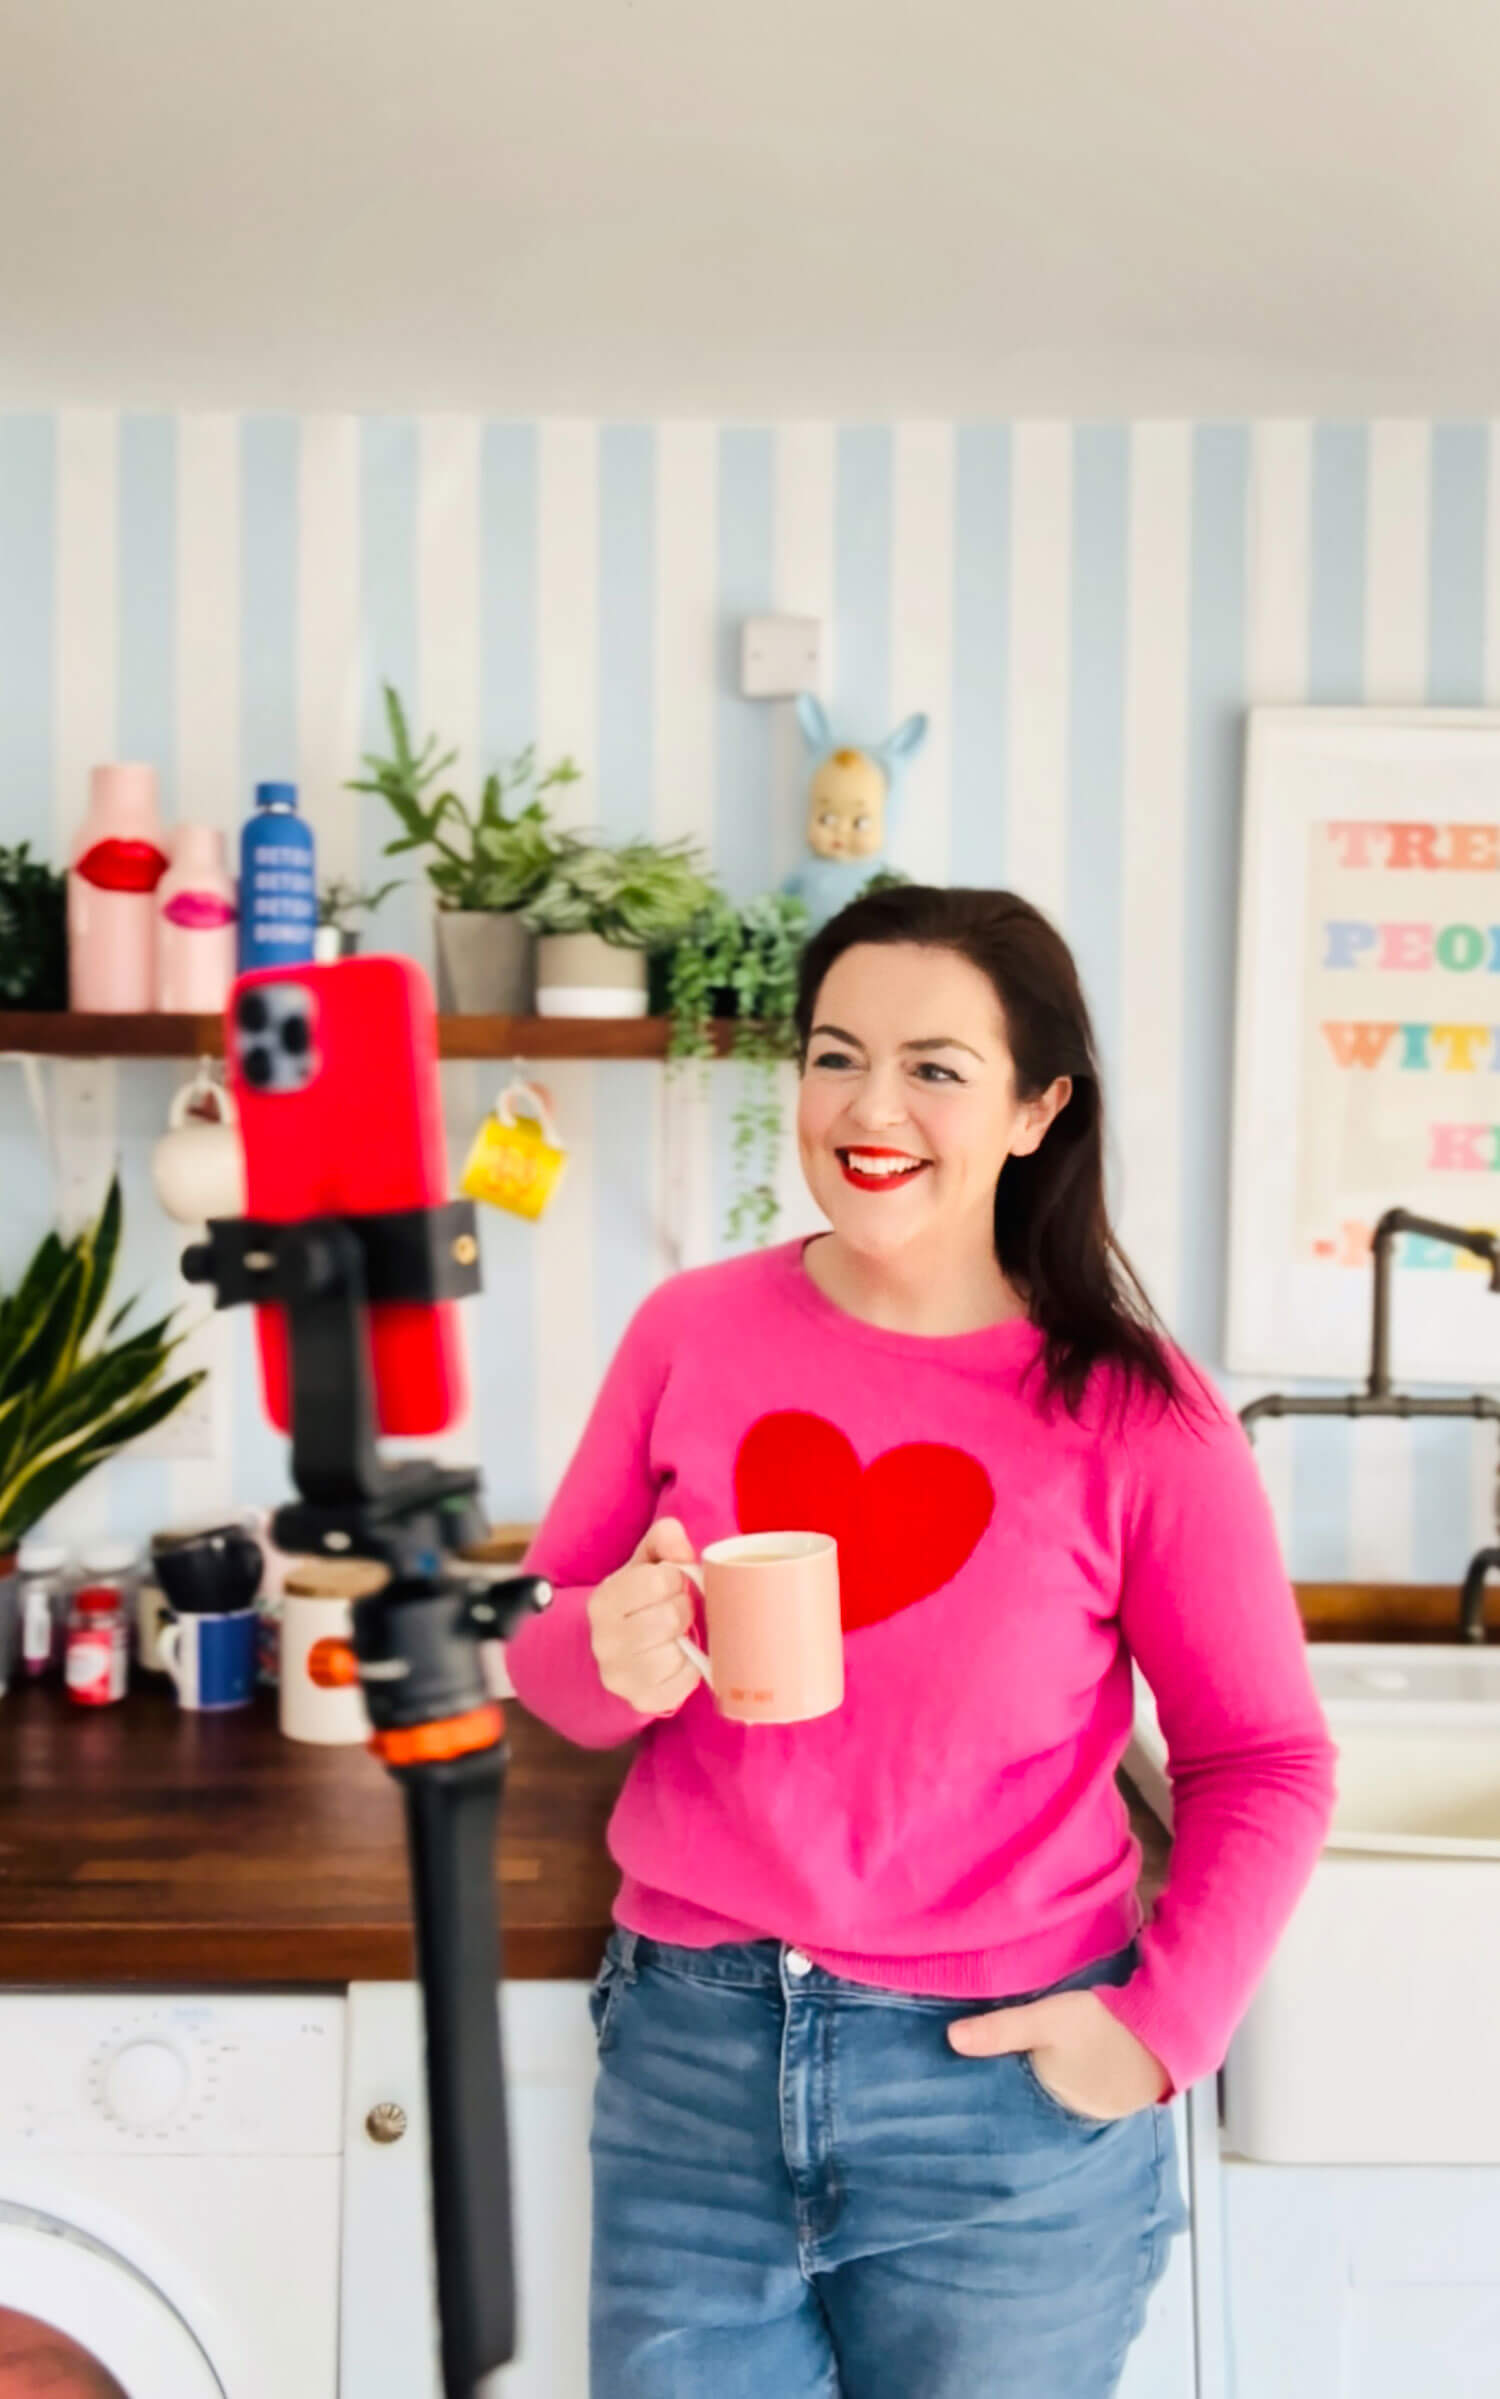
S – Soften the Body
Here’s something I notice in almost every shoot: people smile beautifully, but their body tells a completely different story.
Shoulders creep up toward the ears. Hands grip whatever’s nearby-a chair arm, their own leg, the edge of a table-like they’re about to fall off a cliff. The jaw clenches. These tension markers show up in photos even when the facial expression looks fine. Your smile says “relaxed and approachable.” Your white-knuckle grip on that coffee mug says otherwise.
Before each shot:
- Drop your shoulders deliberately
- Unclench your hands (shake them out if needed)
- Take a deep breath and release it
- Shift your weight onto one leg
The physical relaxation reads as confidence in the final image. And confidence is what we want profile pictures to communicate.
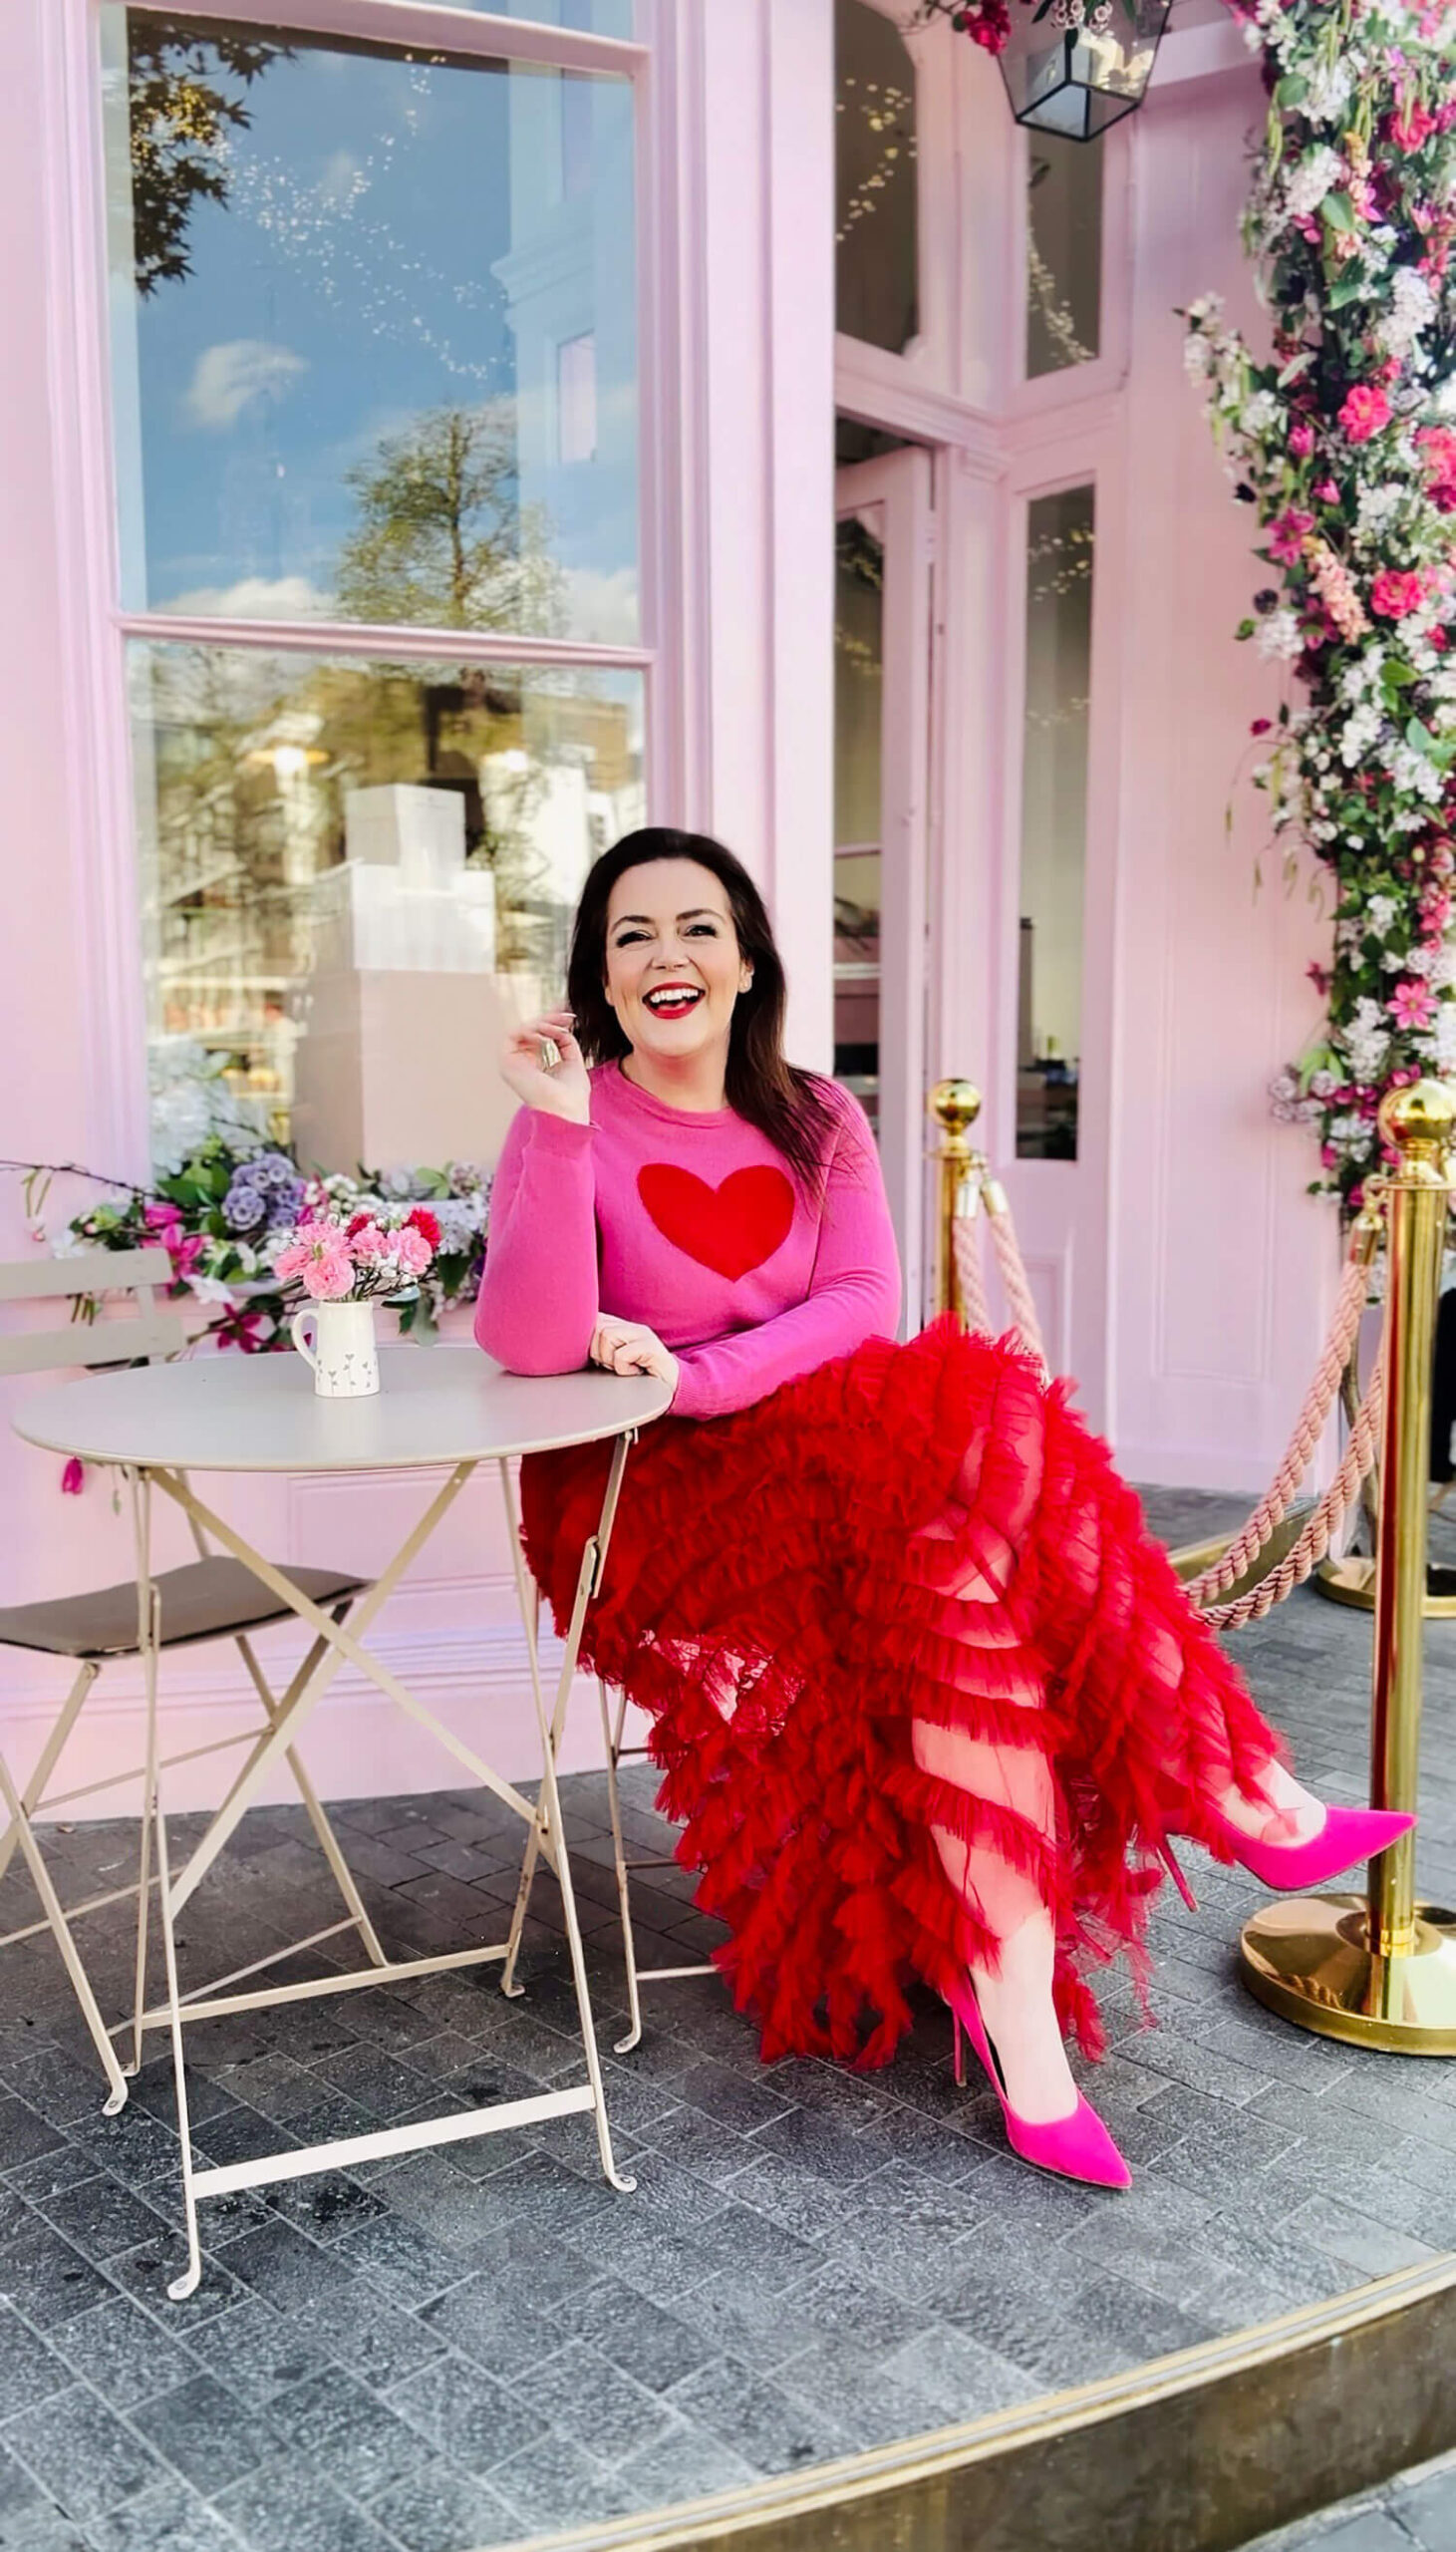
T – Tiny Movement
Models on shoots make constant micro-movements between frames. They never freeze in one pose.
This is the mistake I made for years with my own photos: finding a pose that felt okay and then staying completely still. What I learned is that there’s always one angle that works better-and you only find it by moving. Try different poses and take a lot of pictures-that’s how the professionals do it.
Between each shot:
- Shift your chin slightly
- Tilt your head a few degrees
- Adjust your gaze
- Change the angle of your shoulders
I take about 5 shots per pose, making small adjustments each time, then move to a different angle entirely. This gives you options to choose from rather than hoping one frozen moment works.
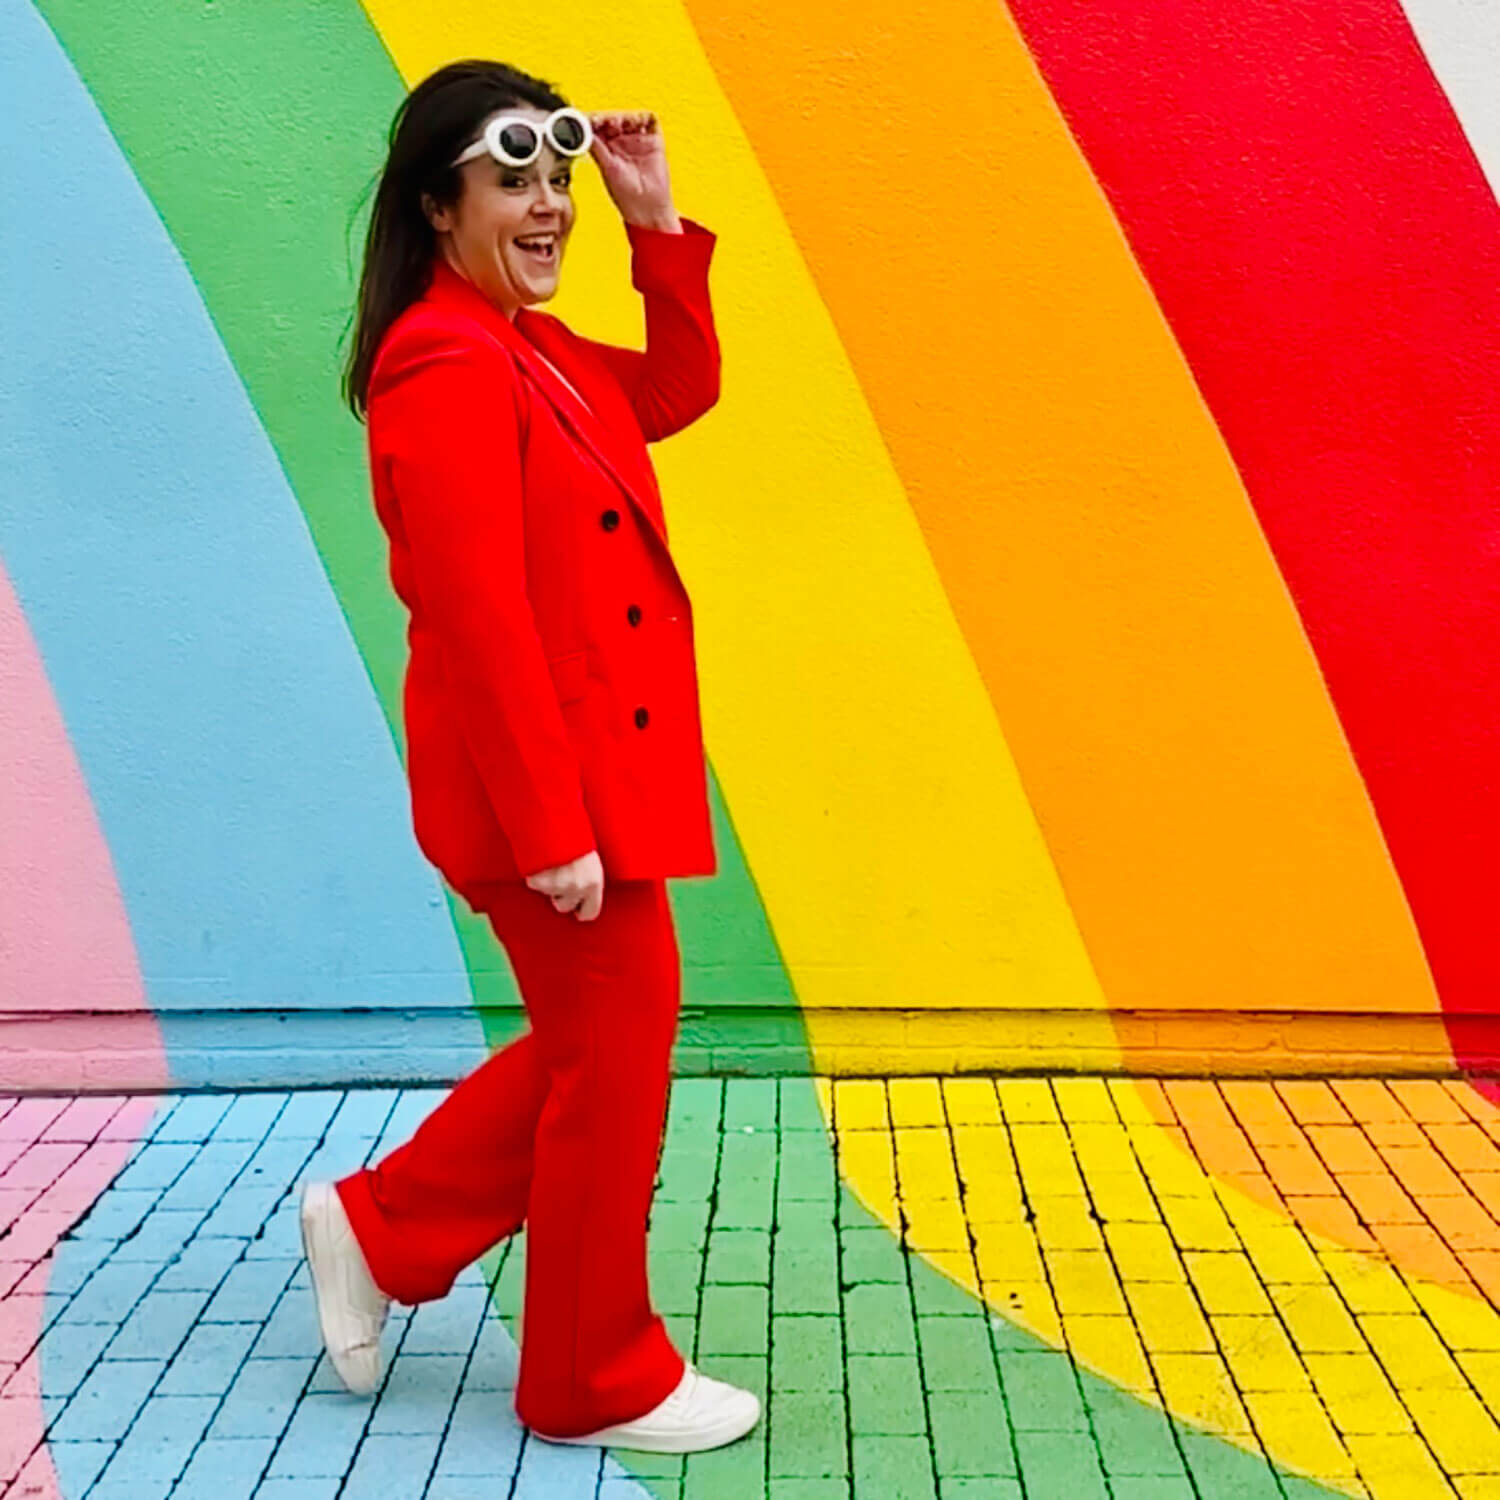
A – Action Over Posing
“Just pose naturally” is the most useless photography advice ever given. Nobody looks natural on command. Try it now. “Be natural.” See? Immediately weird.
What actually works is giving your body something to do: lean against a wall, hold a mug, walk slowly toward the camera, adjust your sleeve, look out a window then turn back. These self portrait poses work because movement removes stiffness, and stiffness is what makes photos feel awkward. Have a bit of fun with it-self portraits don’t have to be serious.
One of my favourite techniques when photographing clients: I ask them to imagine their favourite person in the world is standing behind the camera. (The reveal of whether it’s their partner or Idris Elba always gets a genuine laugh-and sometimes a very telling pause.)
Discover creative self-portrait ideas you can try today
N – Neutral Expression First
The forced smile is the enemy of good photos. You know the one-somewhere between a grimace and a hostage situation. Very Chandler Bing energy.
Start with a relaxed, neutral face. Let your expression settle. Then, if you want a smiling photo, think of something genuinely amusing-not “smile for the camera.” The difference shows. If you’re struggling, try saying the words “yoga” or “why” as you take the shot-sounds ridiculous, works brilliantly.
Your good side? It’s real. Most faces are slightly asymmetrical, and one angle usually photographs better. Notice which side feels more natural and lean into it.
C – Choose, Don’t Fix
Here’s a secret from professional photo shoots: selection does the heavy lifting, not editing.
Editing apps can’t fix a bad angle. They can’t undo lens distortion. They can’t relax tense shoulders. What they can do is make small adjustments to exposure or colour-which is optional once you’ve got a strong image. You don’t need to understand shutter speed or long exposure or tweak your camera settings endlessly.
Take multiple photos. Choose the strongest. The best photographers in the world take hundreds of shots to get a handful they use. Give yourself the same permission.
E – Exit With Confidence
This sounds counterintuitive, but stop once you have two photos you like.
Over-shooting creates doubt. You start second-guessing, your energy drops, frustration creeps in-and all of that shows in your face. I’ve learned this the hard way trying to get photos while out with family. Push too long and you end up with worse results and possibly a passive-aggressive comment from your partner about “how many more?!” which really brings out that relaxed, confident energy you were going for 😂. Don’t spend a lot of time trying to perfect what’s already good enough.
Set a limit. Get your shots. Move on. You can always take more another day.
The Three Things People Get Wrong When Taking Photos of Themselves
Beyond the framework, here are the most common mistakes I see:
1. Chasing perfect lighting instead of Just avoiding harsh light
You don’t need golden hour or a professional light source. You just need to avoid direct sunlight and harsh shadows. Soft, indirect light-like standing near a window but not in the direct sun-is flattering for almost everyone. The middle of the day in bright sunshine? Basically a crime scene photo. Very harsh. Early morning or late afternoon light tends to be softer and more forgiving. And never use your camera’s built-in flash-it flattens everything. Startled squirrel in the headlights is not the look we want!
2. Standing square to the camera
Facing the camera straight-on flattens your features and often makes people look wider than they are. It’s also how passport photos are taken, and nobody has ever looked at their passport and thought “yes, this captures my essence.” A slight turn-even just shifting one shoulder back-creates dimension and a more natural, candid photo feel.
3. Relying on editing instead of distance and angle
I see people spend ages adjusting filters when the actual problem is the shot itself. No amount of smoothing or brightening will fix lens distortion from standing too close. The best results come from getting the photo right in the camera, not fixing it afterwards. Editing is for small tweaks, not salvage operations.
Simple Tools That Make This Easier (Without Overcomplicating It)
You don’t need much. Here’s what actually makes a difference:
Your phone camera – Modern phones are genuinely excellent. You don’t need a DSLR camera. The one in your pocket is fine. Better than fine, actually. It works for all types of photography, from portraits to lifestyle shots.
Portrait mode – For most people, portrait mode is the easiest way to get better results. It makes you the focus and blurs distracting backgrounds. This single setting change can dramatically improve image quality. It’s doing a lot of the heavy lifting so you don’t have to.
A mini tripod – Mine cost about $20 and fits in my handbag. This is the easiest way to get distance without needing another person or balancing your phone on a bin.
A Bluetooth remote shutter – Small, cheap, and means you’re not lunging for a timer. Click when you’re ready. Life-changing for about $8.
The built-in timer – If you don’t have a remote, the 3 or 10 second timer works fine. I use 3 seconds alongside the remote to make it easy to keep in position.
That’s genuinely it. Right equipment doesn’t mean expensive equipment.
How This Applies to Profile Photos, Personal Branding, and Visibility
If you’re a content creator, business owner, or anyone who needs professional photos regularly, the ability to take good pictures of yourself is a genuine business asset. It’s also useful for family photos when you want to be in the shot rather than always behind the camera.
Professional headshots are wonderful-but they give you a limited set of images that get stale quickly. One of my Slay Your Selfies students put it perfectly: “You’ll pay upwards of £1,000 ($1,250) for a brand shoot and probably only get three or four photos that you can use. That’s three or four social media posts before you’re repeating.” And we’ve all seen that person who’s clearly been using the same headshot since 2019. Don’t be that person.
When you can take your own photos:
- Your profile picture stays current
- You have fresh content for social media whenever you need it
- You can capture seasonal photos, behind-the-scenes moments, and location shots without booking a photographer
- You show up more consistently-because the barrier is lower
- You can grab a shot when out with a family member or best friend without the awkward “can you take seventeen more?”
Another student was featured in Forbes magazine using a photo she took herself following these techniques. Her comment: “Proof that you can achieve anything with the right mindset, training, knowledge, and support.”
Visibility matters. If people can’t see you, they can’t be reminded of you. And they’re not going to reach out.
Find out how brand photography builds a professional visual identity
Want This Broken Down Step by Step?
This guide gives you the framework. If you want guided practice-with video demos, room-by-room setups, and a supportive community of people learning alongside you – that’s what Slay Your Selfies is for.
It’s how I teach business owners to take professional-looking photos with their phones, so they never have to rely on a single brand shoot again.
LEARN MORE ABOUT SLAY YOUR SELFIES
Frequently Asked Questions About Taking Good Pictures of Yourself
Set your phone on a tripod or stable surface, step back so you’re at least 6 feet from the lens, and use a timer or Bluetooth remote. Shoot in portrait mode near a window for soft natural lighting. Take multiple shots with small adjustments between each one. It’s a great way to build up a library of usable images with very little instruction needed once you know the basics.
Camera slightly above eye level, never below. Turn your body at a 45-degree angle rather than facing square-on. Tilt your chin very slightly forward and down. This combination flatters almost everyone and is my favourite way to start any self-portrait session.
Further than you think. At least 6-8 feet for full body shots, 3-4 feet minimum for headshots. Crop in afterwards rather than starting too close. Distance prevents lens distortion and eliminates the “selfie look.”
Extend your arm fully, raise the phone above eye level, turn your body at an angle, and take multiple shots. A selfie stick helps with distance, but maximum arm extension with good positioning can still produce decent results for quick photos.
A tripod is the best option for consistent results, but any stable surface works-a stack of books, a shelf, a bag propped against something. The key is getting the camera away from your face and at the right height. See what’s a good fit for your space and budget.
Ah, the eternal question. Mirrors show you a flipped image, which is what you’re used to seeing every day. Photos show how others see you-and any asymmetry becomes noticeable in the unfamiliar direction. The “worse” feeling is often just unfamiliarity, not reality. Your friends have never seen the mirror version of you-they think you look like your photos. Additionally, close-up phone photos distort features in ways mirrors don’t. So it’s not you. It’s physics.
For most scenarios, yes-it’s one of the easiest ways to improve your photos. It blurs the background, makes you the clear focal point, and creates a more professional look without any editing. Worth trying if your phone has it.
Give your body something to do. Lean against something, hold an object, shift your weight onto one leg. Movement and action remove the stiffness that creates awkwardness. Also: drop your shoulders, unclench your hands, and take a deep breath before each shot.
Take at least 5-10 per setup, making small adjustments between each. Professionals shoot hundreds to select a handful. Don’t expect to nail it in one-give yourself options to choose from. Then stop once you have two you like.
Final Thought: Being Photogenic Is a Skill You Can Learn
People usually decide they’re unphotogenic after seeing a handful of badly taken photos. But different lenses, distances, and angles produce completely different results-one image is never the whole truth. (Especially one taken at arm’s length in bathroom lighting. That image is a lie.)
After 18+ years photographing women who arrive convinced they hate photos and leave genuinely pleased with what we’ve captured, I can tell you: being photogenic isn’t a trait you’re born with. It’s a skill you develop through practice and understanding.
The women who look effortless on camera? They’ve figured out their angles. They know how to hold their bodies. They’ve practiced. You can learn the same things.
You’re much more loved than you think. And you deserve photos that actually look like you-the version other people see, not the distorted close-up your arm-length selfie captures.
Start with distance. The rest follows from there.
These techniques work whether you’re at home, at work, or travelling. Solo travelers often ask kind strangers to take their photos-but with a tripod and timer, you can find your own photo spot and get better results yourself.
Rosie Parsons is a brand photographer with 18+ years of experience, winner of Cosmo Bride Wedding Photographer of the Year, and creator of Slay Your Selfies – the DIY brand photography course that’s helped hundreds of business owners take professional-looking photos with their phones.